Showing posts with label die labeling. Show all posts

Thursday, November 7, 2013

Sentinel Images


Back in the 80”s my older son was very interested in computers.  He talked me into buying two Apple II’s, one for him and one for me.  The local school system was making a bulk purchase so it was an opportunity to go in with them and get a discount price.  Of course, it was actually only good if you could use a computer or wanted to learn how.  I was a bit skeptical that personal computers offered anything for me but I was led along by his enthusiasm.

Keith was the one who could clearly see the future of a PC world while I couldn’t even figure out why anyone would need a database or a spreadsheet.  He tried to get me to understand bulletin boards but it was just beyond me.  He went on to get degrees in physics and computer science and I slowly got better and better with a word processor.

More than 30 years have passed and integrated circuits, operating systems with graphical interfaces, and portable laptop designs all worked out.  Even I have learned to use more than the word processing capability.

I remember a discussion in which Keith was trying to convince me to set up a system in which I could identify files by an icon instead of a text label.  I really couldn’t quite grasp that concept then but can see it clearly now and I do use it.  I use it in another context.

When I make a forming die and get it perfected, I forge an example of the finished piece and weld it to the die in a spot where it is easily visible. I call it the sentinel image.   I also write some information on the die with a presto pen correction marker but it is usually the iconic sentinel marker which is most helpful to me in locating the die I need.  In addition, I have taken to spray painting the sentinel image with a bright yellow paint so the form is accented and unmistakable.


It was only in the past few months that I made the mental connection between how I used the method in my studio and what Keith was trying to get me to understand three decades ago.


Tuesday, March 22, 2011

Dual Tang Die Carriage


My first power hammer was a 50 pound Little Giant. I took the rebuilding course offered by Harlan "Sid" Suedmeier in Nebraska City, Nebraska. Check out http://www.littlegianthammer.com/.

I added the usual modifications, spring guard, flywheel brake and a die carriage. Originally the die carriage was a single socket off to one one side of the combination die that would accept a 1" square tang. A variety of dies were made which fitted into that retainer, flat texturing dies, stops of thickness from about 14 gauge up to 1.5", and spring dies. It was the spring dies which gave me the most trouble with wobbling and loosening and loss of control and led to adding a second tang socket on the other side of the power hammer die.

I was very impressed with the increased stability and eventually modified all my dies to the new platform. Later I learned to make my own power hammers based on the Ray Clontz style 50 pound spare tire hammer (STPH) idea. The first one followed the set of plans rather closely in most aspects but after some experience with it I built a couple more hammers with wider throats and 75 pound hammer heads.

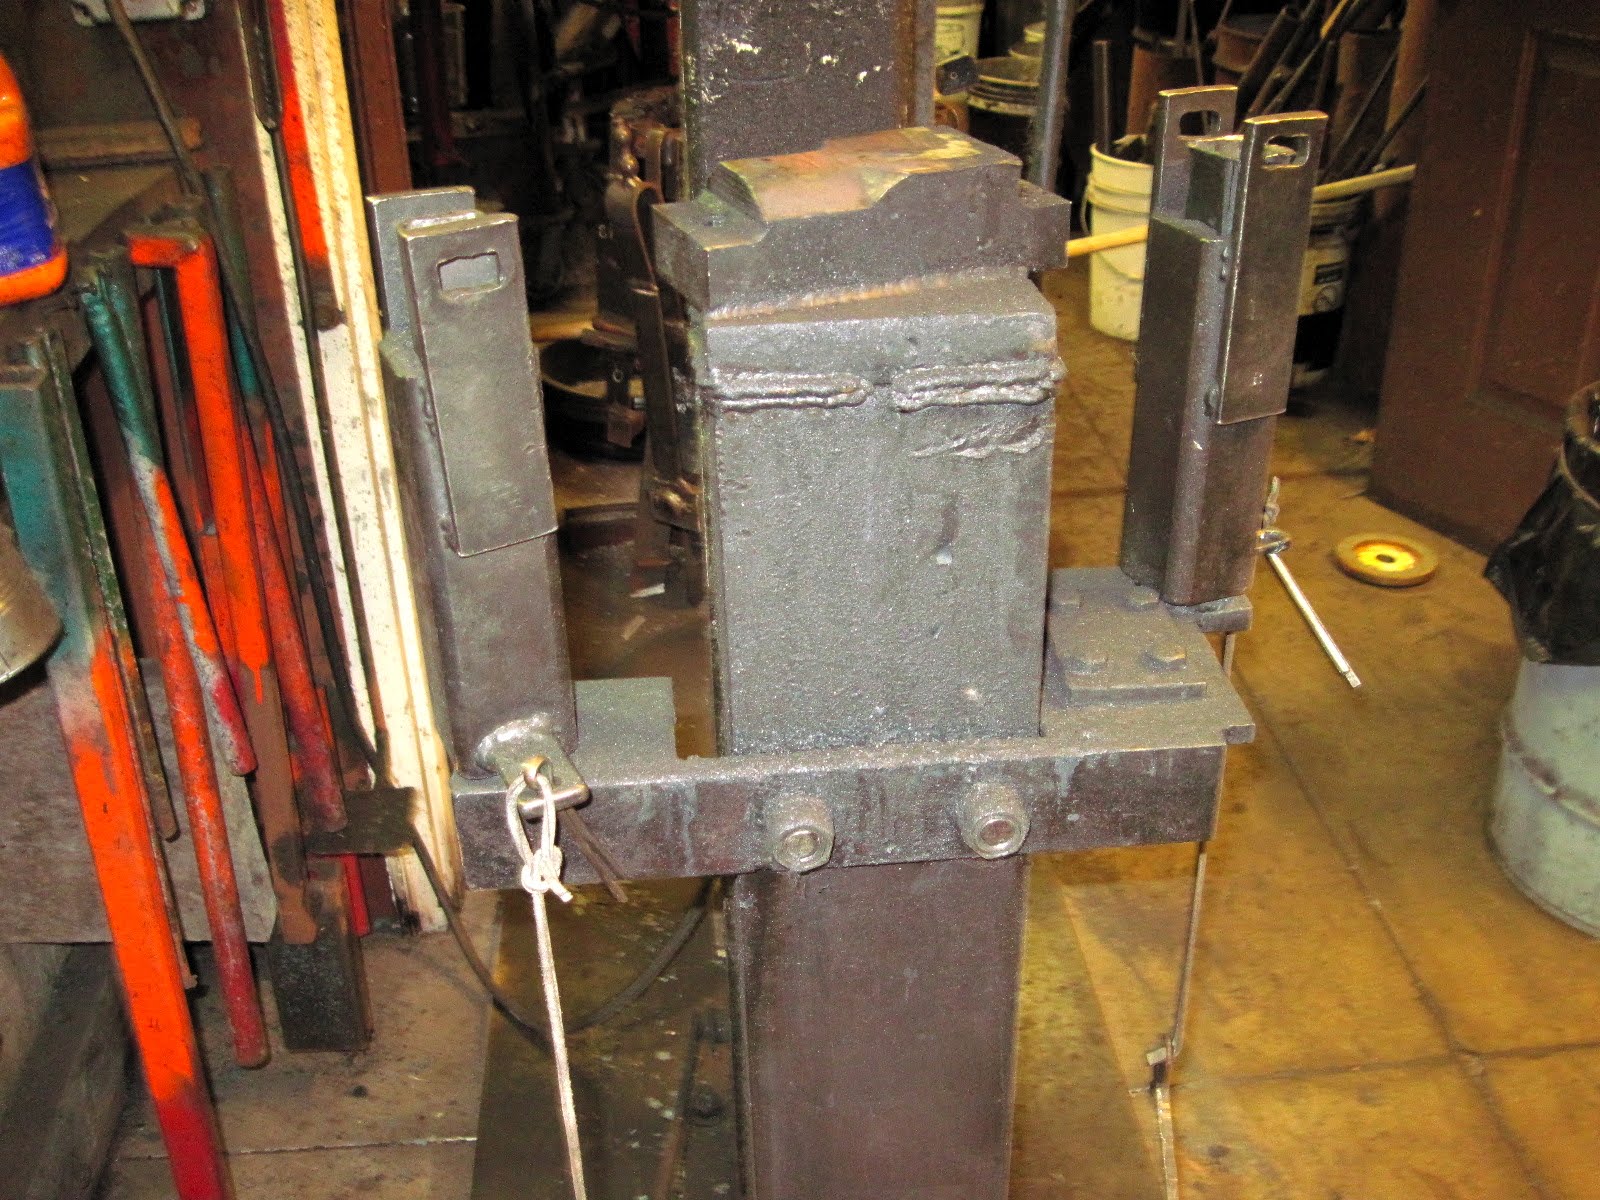
On the newer hammers I constructed quick release dual tang die retainers. Refer to the diagram and images above. The basic concept is to hold the die in place with just the weight of the square tube sleeves surrounding the post sockets which receive the die tangs. The die is dropped in place and each sleeve is lifted and a forged "T" shaped key slides in over the die and locked with a large cotter pin which is tethered to the key. To change dies I pull the cotter pins and place them in drill holes in the base tabs and slip out the key and just drop it. The tether prevents the keys from getting separated from the system.

This mechanical system restrains the dies rather tightly in front-to-back and side-to-side directions but permits some up and down movement which doesn't seem detrimental and may actually protect the die. In my situation I found that the stop dies don't require dual tangs but all others are designed for two tangs.

I made a jig to hold the tangs in place while welding so I know they will fit the sockets well. Also the tangs which are made from 1" 14 gauge square tube scrap pieces about 1" to 1.5" in length are "tapered" by collapsing the sides on the leading edge of the tang with the cross peen of a forging hammer.

Stamping each die with some alpha-numeric label is one more detail which aids record keeping. Naturally the stops are stamped with their thickness. Others are stamped with something like BT6 for the #6 bottom texture die. My project notes will record exactly which die was used.