Thursday, August 30, 2012

Added Value in Drops


I used to think of drops as waste, a nuisance. But after I found a way to sort and store them for my advantage my opinion of their value changed.

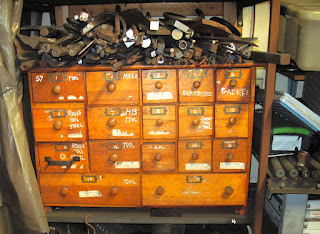
Now I think of them as precut parts.   I have a few bench top boxes which store flat and square bar, round bar, pipe and tube, and angle and channel drops from very short up to about 12” in length.  It is interesting to me how stable that inventory seems to remain.  Drops are added and removed at approximated a balanced rate.

Mostly these pieces are used to make jigs and other shop aids where exact dimension isn’t always critical.  More often than not I can got to a box and quickly sort through and find a suitable piece ready to use, already cut and tumbled clean of burs, scale and rust.

Wednesday, August 29, 2012

Making Work Stands


I have made a number of work stands and the most satisfactory design, for me,  is made with a base of 16” to 20” wide plow disc, a vertical section of pipe or tube 16” to 20” tall with a hole drilled near the top where I weld a nut/bolt/T-Handle assembly as a locking devise.  The top vertical section is made from a pipe or tube which will fit comfortable inside the base tube.  The transverse top is made from 1” square tube or round tube 8” or more wide with a couple of end vertical stubs.  The easiest way to make those is to cut three walls of the tube and bend the stubs up and reinforce the remaining wall with a weld bead as shown in the image.

The top width depends on how the stand will be used.  Stability results from keeping most of the mass concentrated toward the floor and keeping the transverse top width to a minimum so the work is centered over the vertical shaft reducing the moment arm.

Most were made in the early days and almost all the components were easily attainable scrap.  Each band saw has two, each drill press has one, the forge has two so that makes eight.  When I was cutting a lot of longer structural steel to build equipment for the shop I made a couple of stands with 2” rollers, scrap from a food processing line.  They were OK for that specific purpose but I no longer use any.   The rolling feature is now mostly annoying.


Sunday, August 26, 2012

Tools Drive the Work ...


I’m pretty sure when I was starting to learn blacksmithing I was thinking “work drives the tools”.  This is a version of the “chicken or the egg” conundrum.  I wanted to heat and move iron to make creative things I was imagining so I needed to make and acquire the necessary tools.

It wasn’t long before I began to see it the other way around.  Since I had such and such tools, I could do so and so with them.  Tools were driving the work possibilities.  Each new major tool seemed to greatly change the prospects for work.  Treadle hammer led to the Little Giant which lead to the Hydraulic forging press.  There were many smaller intermediate steps but those three brought the greatest transformations.

Of course it is an equilibrium equation where the back and forth is inseparable.  Maybe it is actually more like the rock-paper-scissors game.  Experience/Skill allows creation of a Tool Inventory.  The Tool Inventory facilitates the production of Creative Work.  Creative Work grows the Experience/Skill.  One never really gains an advantage over the other and the creative cycle is unbounded.


Thursday, August 23, 2012

Tactile Dimensions of Iron


I recently heard a commercial where the person said, “Don’t you just love the feel of gold?”  Besides giving me an uncomfortable recollection of the King Midas legend it reminded me of a few comments about the tactile esthetics iron work which I have tucked away.

I can’t recall the person who said, “Easy on the hands means easy on the eyes.”   But, I’ve seen that demonstrated by several blacksmiths.  Finishing the surface by sanding with 60 grit abrasive before applying a finish sealer coat gives the surface a very appealing feel as well as appearance.  I like for the surface to feel very smooth and silky.  I heard one client use the term velvety.

Another remark came from Jeff Mohr at the June 2001 Ironfest in Grapevine, Texas.  He told a story about a potential buyer being turned off by the feel of an item she was examining saying it felt sticky or dirty.  He decided to pay more attention to how a finish felt to touch as well as how it looked.

I’ve heard people say the like the coolness of ironwork and they like the heft of ironwork.  That led me to enquire more about the vocabulary for describing touch experience and I found this interesting three dimension graphic contrasting some tactile surface judgements -  soft/hard, smooth/rough and slippery/sticky.  I suppose sharp/dull is, technically, a characteristic of an edge and not a surface.  I added my fourth dimension of cool/warm. 

http://krieger.jhu.edu/mbi/hsiaolab/directory/currentProject_tactileTexture_perception

Don’t you just love the feel of iron?


Wednesday, August 22, 2012

Taking Small Bites


When working new projects that involve multiple steps or processes I like to spread the work out over several forging sessions.  I set up work so that one or two steps are done each day.  That gives me time to study the progress and make any needed plan changes.

When a project has been well worked out and the routine established it’s a different story and I work start to finish at one session.

I organize a queue of work so that if I run into a problem with one job I can lay it aside an move up another and keep up a steady pace of work.  I don’t have to stop and solve the problem until later.

Lately this strategy has been particularly noticeable as I have been doing a lot of die making.  Forging the positive form in one session.  Sinking the positive into negative blanks in the next session.  Cleaning up and relieving edges in the negatives and refining details.  Then working back to forging a more refined and detailed positive.

That back and forth work can run over several days but only take a few minutes of each day.  The small bites eventually produce the desired result - incremental progress through patient and persistent fiddling.

There are a number of other examples in blacksmith work where it is important to proceed slowly and carefully so as to not stray too far in one direction and find it difficult or impossible to recover control.  I can faintly hear the teacher saying, “Haste makes waste.”

Friday, August 17, 2012

The Scale Blowpipe


Lately, I’ve been using the hydraulic forging press and various dies I’ve made to form some small botanical and animal elements.  Usually I do these in runs of 20 to 30 so I have an inventory which will carry a while.  In the process of stamping one hot billet after another scale accumulates in the die cavity and could cause loss of detail if not removed.

I found that using a brush was awkward in the tight space and I didn’t have enough wind power to lean in and blow it out so I made a small blow pipe which works well.  It was formed from 3/8” tube and is 13” in total length.  One end is flared to form a trumpet-like mouthpiece and the other  end tapered to bring the outlet hole down to about 1/8” diameter.  Thanks to Bernoulli's principle a small puff of air into the mouthpiece pushes out a powerful jet of air removing the scale.

For many years the DuPont company used the advertising slogan, "Better Things for Better Living...Through Chemistry."  I suppose this is an example of better living through physics.


http://www.persimmonforge.com/

Sunday, August 12, 2012

Making Power Hammer Stops


Maintaining the full thickness of stops for the power hammers is more of a challenge that with the hydraulic forging press.  The repeated striking of the stop over time by the power hammer ram die tends to diminish the thickness through cold forging even when they are made from tool steel.

I have made a number of the stops from railroad clips.  They are plenty tough but apparently not as hard as the 4140 dies in the hammers.  I found this source which suggests they are about 1050. http://forums.dfoggknives.com/index.php?showtopic=16220

To make stops I heat the clips and straighten them out.  The hydraulic press works well for that.  Next, I forge a tang approximately 2” long to fit the die socket or smaller if I plan to fit a piece of 1” square tube over it to finish the tang shape.  Then I forge about a half inch of the tip to the desired thickness and let it get as wide as it naturally gets so there is as much flat surface area as possible without going to extra work.

Under normal working conditions the working end of the die should not take a lot of abuse but, over time, the tips do get a little thinner and 5/8” eventually becomes 5/8”-weak and then 9/16”-strong.

My original idea was to reforge the stop when it became thin, pulling more mass out from the body area into the working area. I’ve done that about four times but, in practice, it has been handier to keep the strong/weak dies and just make a new nominal dimension one when a critical thickness is needed.

The current collection contains about 25 stops from about 16 gauge up to about 1.5”.  I have them arranged on a carousel rack near the hammers.  There is a secondary rack for about a half dozed stops very close to the primary hammer to hold the ones to be used in the current forging cycle.

`


Friday, August 10, 2012

The Humble Quench Can


Sometimes I am amazed at what I cannot find on the internet.  Perhaps not as often as being amazed at what I can find.  My old slack tub dipper, which I’ve always called a quench can, was dilapidated and heavier that it needed to be so I decided to make a better one.  I did an image search to see what clever designs other smiths may have posted.  After considerable searching using several possible titles I found only one decent image.


It is just the s run of the mill variety like I made and was now planning to replace.  This is such a common blacksmithing tool I thought, surely, it would be better documented.  When I searched my memory I couldn’t come up with much either.  I did recall seeing examples using a spring ring to capture the can instead of riveting or welding and that seemed like a good idea as it allows the can to be easily replaced.

My original can was fabricated from 14 gauge sheet and MIG welded.  It holds about a cup or cup and a half of water and has held up well.  I punched three holes in the side so a small stream of water could be be accurately dribbled on a small area as when cooling a twist or one side of an off-center punch hole.  I was told that punching control holes like that allowed the tool to be called a Tennessee valve.  Probably a term not favored by those from Tennessee.

The old can was battered and looked like it had been stepped on or run over and straightened several times.  It that condition it isn’t exactly photogenic.

I didn’t bother forging a new handle grip but found an old twist crook piece and welded it to a piece of 1/8” x 1/2” flat bar.  The I formed a ring which would capture the can.  I used a 14 oz Alaskan pink salmon can.  It is seamless, aluminum and has a nice taper to push into the spring ring.

I forgot to record the final length but it is somewhere between 16” and 24”.  If I was to take the time to make a better grip I would think about handrail code dimensions for easy grip and control. I think this will work well for me.  It is quite a bit lighter than the old one.  I didn’t put any holes in the side yet.  Time will tell if I feel like I need that modification.


Tuesday, August 7, 2012

Triangle Dinner Bells


A triangle bell that actually works is not as simple as it might seem. The triangle itself is best made from solid steel round bar at least 5/8” in diameter. Triangles made from smaller stock will not ring loudly enough for outdoor use. A bell made from 3/4 " solid round sounds better than one made from 5/8" but at some point increasing the mass brings diminishing return.

The triangle needs to have a large enough internal diameter so that there is room to swing the striker vigorously with a circular motion. 16” sides work pretty well.

The triangle must be left open and the two bends have a critical radius to produce the harmonic sound. If the bend is too sharp or choked it will diminish the ring - see illustration. Bending over a 5/8” radius works pretty well. Leave the triangle clean and simple and put any ornamentation on the bracket.

The triangle must hang with leather or other material that doesn’t conduct sound well. I like to make a special swing arm bracket so the bell can be moved out of the way when not being used.

Assuming the bell will be used by an adult, the height of the top of the bracket should be about 75". With a 3” leather hanger the triangle is a good height to strike.

Most of the examples I see are so small they must be intended for “in house” use or just decoration.  The dinner bell was a frontier tradition and fitted well with our old time demonstrations at the National Tallgrass Prairie Preserve.


Monday, August 6, 2012

Sonotube Containers


In 2007 I decided to try showing some work at a couple of summer art/craft shows.  One of the issues was making a display system and also there was the problem of transporting the heavy pieces without getting them banged up.
This idea isn’t original with me.  I adapted my system from some of the blacksmith meeting gallery displays I had seen.  I purchased 16” sonotube cylinders at a local hardware store and cut them into 2’ sections.  I got some 2” thick blueboard and cut out circles which would fit inside.  The bottom one was glued in place.  I learned a bit about proper adhesives for the job after trying one which dissolved the plastic.
The top circles were about 20” diameter and cut from hardiboard.  One of the blueboard circles was centered and glued to the hardiboard to help it fit securely in place.  All exterior surfaces were painted white.
The containers were sturdy and I thought the concrete tops might be good insurance against a sudden summer shower.  For transporting, I put the cylinder inside a heavy-duty contractors trash bag, put the ironwork inside the cylinder, added protective packing material, then pulled up the bag and tied it so there was complete weather protection.  The lids were all placed in a couple of other trash bags.
When we set up at a show it was relatively easy to move each cylinder on a hand cart, untie, unpack the ironwork, put the bag and packing back inside the cylinder where it was out of sight, put on a lid and arrange the ironwork on the display pedestal.
I’d say it all worked pretty well.  I’ve thought about using pieces of sonotube with blueboard ends as shipping containers but haven’t actually tired it.
I don’t do shows anymore so the containers just serve to store finished items and keep them protected. I enjoyed the show experiences except for the effort involved in getting there and back and the setup and take down.  It seems like an activity suited for the young or for crafts that don’t involve a medium as heavy as iron.


Saturday, August 4, 2012

Collected Tool Steel

At the time I was beginning blacksmithing, there was an enormous volume of antique agricultural equipment being scrapped and our area is primarily agricultural so I had easy pickings.  I was also lucky to be a friend of the scrapyard owners and operators so a lot of the time they didn’t charge me anything.  They charged for the type of material which was their high profit variety - massive and dense or didn't require being worked (disassembled, cut, crushed) before being loaded for hauling.
Mostly I picked up mild steel and wrought iron but from time to time built up a collection of steel suitable for tool making.  I call this “Uncertain Alloy Scrap.”  It didn’t come with a pedigree so I have learned the properties through irregular metallurgical experimentation.  The spark test on a grinding wheel is sometimes useful.  Mostly my testing involves seeing how quickly the piece draws heat - what is the terminal heat color - how hard is it to move with the hammer.  After cooling it is tested for it air hardening suitability.  If it doesn’t hold up to an air hardened edge test it is reheated and oil quenched.  If it still won’t hold and edge, it isn’t tool steel for me.  I never want to rely on a steel which needs water quenching.
So with practice I have found how to use pieces from this list of things I’ve collected:
Hay Rake rod
Harrow tines, spear type
John Deere Rotary Hoe tines
Hay bale spear spike
Deep cut plow discs
Caterpillar track pins
Road Grader blade
Jack Hammer Bits and Hex drill rod
Vehicle Axles, Tie rods and Coil and Leaf spring stock.
Trenching bits (excellent for hardy tools)
Lawnmower blades
Railroad rail clips and high carbon spikes.
I have hoped to find a Forklift blade to cut up for die stock but have never seen one in a scrap yard.
If I have a project I feel is really important I will use a known alloy like 
S7, H13 and 4140.  I don’t live in a large manufacturing area so it is hard to find known alloy tool steel drops.  At blacksmith meetings I have picked up some at scrap prices but when I have to buy it from the online suppliers the expense really bites.
Sadly, the old scrapyard is now closed.  But, my good fortune was to build up a big pile during the easy times.  Almost all of my tool steel is shelved inside the shop now. The outdoor pile has dwindled over the last 15 years and the other day I noticed I could probably put all of it in the bed of my 1995 Dakota and haul it off in one load but what’s left will probably be enough for my needs.


Thursday, August 2, 2012

A Bucket a Day


On a typical day, Ken comes in and starts the coal fire.  I haven’t done much of that since he has been helping me.  He has been on vacation all this week so, the job falls to me for a while.
As I filled the coal bucket from the bin I thought about the tools design.  It’s easy to fill, carry and empty and totes about 20 pounds of fuel.  I remember seeing coal scuttles, or hods, and coal shovels around the neighborhood from my earliest days and those from older generations can probably say the same thing.
I am using about one bucket a day for my two to four hours of forge work so the bucket gets used just once a day and only travels 20’ to the bin and 20’ back.  It has no other use and doesn’t go anywhere else so it is truly one of those dedicated tools.
This morning I turned to Google search to see what else I could find about coal buckets.  Surprise.  Surprise.  There is more material about coal buckets than I would have ever imagined and I didn’t take the time to check out most of it.  One piece which seemed worth bookmarking was from an old sheet metal book which gave instructions for making what they called the elliptical coal bucket.
I know, however, that I will never make one.  I see I can get one from some hardware stores for under $20 brand new.


Wednesday, August 1, 2012

Pedal Hammer Seat Bracket Modification


I have been working on some small botanical elements, grape leaves, sunflower centers and such using the pedal hammer and veining tools.  The machine I use frequently is a prototype model and had a old style seat bracket which didn’t allow enough foot clearance when sitting down and getting up.  Every time I sat down and wiggled my left foot through the narrow space I would think, “I should fix that.”  However, that thought was immediately followed by, “That will take thirty minutes and be a hassle.”  So the problem lingered until yesterday.
I finally got an adjustable wrench and took the seat and bracket off, made two cuts and two welds and put it back on in thirty minutes.  A big improvement.  So the lesson, for me, is when building the bracket try to keep a shoe length distance between the anvil post and the seat bracket frame.
Now every time I sit down I’ll think, “I should have done that two years ago.”